Showing posts with label DIY. Show all posts

Wednesday, November 16, 2011

Eventful Wednesday: A New Tradition

I have noticed that a lot of the "guest books" being used at weddings now a days are not the traditional scrapbook. Instead many people are using unique and creative approaches to remembering their guests and often turn the "guest book" into a piece of art for their newlywed home. We thought we could share our favorites in hopes of inspiring your own creative take on this long standing tradition. 


This is an easy DIY project. All you need is a sheet of frosted heavy plastic from a hardware store as well as wooden letters and craft pens from your local craft store.

I have often seen this idea used in tree form as well, using guests fingerprints as leaves. Don't forget to add a thin tipped pen so that guests can sign their fingerprints. 

There are many options to use this idea on your special day. Using the first letter of the couples new last name, using the first letter of the bride and groom's first names, using the first letters of the couples respective last names...either way it's a great guest book idea to use as decoration in your house!

How fun would a photo book of your guests be on your 50th anniversary? Pictures are worth a thousand words and this great idea captures the joy everyone shared on your special day. 

If you really love DIY projects, you can take your guest's puzzle pieces and turn them into the top for a coffee table in your living room. You can also put the puzzle pieces in a large hurricane vase and display them in your home. 

Friday, November 11, 2011

Fun Friday: It's all in the lighting

Nothing to set the right mood than a few great candles. Recently I had been searching for a great unique way to use candlelight without sticking a plain white candle on the table. While it is possible to get a great look with just candles, I found a few ways to dress things up. Even better they are all do-it-yourself activities so you get to let your wild creative side wander for a bit! 


Make your own tealight holders

I really like the translucent nature of these tealight holders. The softness of their glow is really romantic. If you would like the full set of directions, you can find them here.


Lace and twine covered mason jars 


I find these to be gorgeous. They dress up the ever so popular mason jar as well as create a really unique and aesthetically appealing display.

1. You can use mason jars, jam jars, or just about any clear jar you would like to decorate. 
2. Next you will need vintage inspires lace and garden twine, all of which can be found in your 
   local craft or fabric store. 
3. While at the craft store make sure to pick up a bottle of Mod Podge and a foam brush. 
   Apply a light coat to the outside of the jar you are using and then cover the jar in lace.   
   Apply another light layer of Mod Podge onto of the lace (it dries transparent so don't 
   worry!). The same application process would be used with the twine.     

Wine Glass Lamps

1. For this project you will need to by sheets of vellum, which can come from your local craft 
   store or bought online from a paper company. You will also need to print this template for   
   the lamp shade.
2. First trace the lampshade pattern onto your sheet of vellum. When you go to cut it out, it is 
   best to use straight scissors for the two sides, but to add some flare, you can use crafting 
   scissors to cut the bottom curved portion. 
3. Feel free to add in any other decorative elements, whether you use punch outs, apply 
   ribbon, or use a silver sharpie to stencil on designs. 
4. Glue the two straight sides together and allow to dry. Place a tealight in the wine glass, set 
   your lampshade over top and enjoy your new set of lights. 

Wednesday, November 9, 2011

Eventful Wednesday: Time for Thanks

If you have a large family like me, Thanksgiving is always a great time of year. Family members from around the United States come to one central location to eat delicious food, play football, and then partake in the mad rush of Black Friday shopping. The bigger tradition in my family has always been the adult and kids table. I graduated to the adult table a few years back, but since I have so many young cousins, I still like to visit the kids table. In the past few years I have taken on the role of creating fun table settings for both the adults and kids so I thought it might be helpful to get you inspired with a few decorating ideas. From sophisticated and mature adult table settings, to the fun place cards and activities for kids, I hope that your Thanksgiving has tons of things to give thanks for. =)


The Adult Table


Who says we need to eat like the pilgrims? I love the modern warmth of this table setting. 

Using chocolate bars with homemade wrappers as place settings =)


A fun DIY addition to the center of any table

The Kids Table

My grandmother did a great job of teaching me what Thanksgiving was all about. Have your kids put what they are thankful for on a feather and display this as their centerpiece. 

Yummy treats that will convince anyone to eat all of their turkey first.  

Edible place cards are always a winner with my cousins. Learn how to make these here.


Friday, October 28, 2011

Fun Friday: Halloween Spectacular

If you are anything like me, you have yet to buy your Halloween costume and will most likely be rushing through a thrift store tomorrow morning. Well, to save you the hassle of thinking too hard to determine what would be fun and creative, I have compiled a couple of my favorite Halloween costume ideas so far this year. Happy shopping and have a fun weekend! 


Kid's Costumes

Audrey Hepburn =)

Baby Candy Corn

Where the Wild Things Are

Particularly cute if you decide to dress yourself up as the chef!

Family Costumes

Classic BLT 

Pixar's UP!

Couple Costumes

Mary Poppins

Alice in Wonderland 


Friday, October 21, 2011

Fun Friday: Design your own Dessert Bar

Have you ever been to a wedding and some how you missed the cake? Or maybe, like my good friend Lexie, you just don't like cake. I have been keeping my eye on some great ideas of how to make the dessert portion of your wedding fun and interactive. The bride and groom can have a blast combining sweet treats from their childhood or take a sophisticated route by classing up some classic elements. Just by adding small baggie or to-go containers you can transform your dessert bar into a customized favor station. 

Have fun tying together the color pallet of your wedding with your unique dessert bar


Chocolate and browns are always great for a groom inspired dessert bar 

I couldn't resist showcasing this GREEN dessert bar

This fun ice cream inspired dessert bar adds some nostalgic bliss

Having a winter wedding?

A warm cookie and milk cocktail anyone?

This just made my heart sing. A hot chocolate bar with assorted toppings

 What a great way to class up an old campfire treat! This dessert bar is truly making s'more for everyone.

xoxo Have a good weekend


Friday, October 14, 2011

Fun Friday: A new type of flower

 In the spirit of staying green, today we wanted to share with you some great photos and DIY tutorials on how to create felt or fabric flowers. Not only will they stay "fresh" all day long but these pretty flowers can be re-used throughout your house to embellish pillows or clutches. 


These great idea boards demonstrate all the different and creative ways fabric flowers could be used during your big day. 
                            
Feel free to get creative and add buttons or attach name cards for seating assignments. 

Embellish a journal and gift them to your bridesmaids, or reuse the flowers from your wedding to embellish a clutch. 

Thanks to Skip to my Lou, you can learn how to make 11 different fabric flowers here.


Monday, March 28, 2011

Eco-Monday: Putting the Glam in Recyclables

From this... 
     

to That.


Hello again from the intern! As any normal child, my desire to recycle came from a need to save the animals after I watched the movie “Happy Feet”. Just out of pure interest I “googled” 'facts about aluminum drink cans' today and stumbled across the Can Manufacturers Institute. The fact that made me realize just how important throwing my coke can in the recycling bin stated, “For each pound of aluminum recovered, Americans save the energy resources needed to generate about 7.5 kilowatt-hours of electricity" If you are unfamiliar with kilowatt-hours (as I was), this equates to the amount of light Pittsburgh uses....over a 6 year period!!! So now that we all know just how important recycling these small cans is, I present a crafty solution. 

As a college student I am always on a tight budget and yet I'm constantly searching for a piece of jewelry that will spice up my outfit. I tried my hand once as designing my own necklaces but that never seemed to turn out well. My solution to this dilemma later came when a friend of mine discovered Etsy while preparing for her wedding last November. I discovered so many great vendors that re-use everyday products to create gorgeous one-of-a-kind pieces. The vendor I'm currently hooked on is JMP DesignsThis vendor re-uses the drink cans her family consumes in order to create adorable and trendy pieces of jewelry.  In reading her bio I was happy to discover that her goal was to make the world a little greener with style,” a statement that any green goddess can relate to.

So as the season moves on and the bright fun colors of spring make it back into your wardrobe, I suggest checking out this vendor and realizing the amazing impact that buying an adorable new necklace can make. 

Enjoy the week!

Friday, March 25, 2011

Fun Friday ~ DIY Herb Garden...in an old shoe organzier

Happy Friday everyone.  Spring is in the air, and everywhere you look flowers and plants are starting to peek out at us.  Having moved so many times in my life (most of them being rentals), I've found it difficult to really connect with my garden.  So you can imagine my excitement to find this brilliant do-it-yourself vertical herb garden inside of a hanging shoe organizer.  It's easy to set up, it's portable, and for those of you who live in apartments or have limited gardening space...it can hang just about anywhere.  And it keeps the cats away too. 


To create your own Vertical Herb Garden, simply follow these steps from Instructables.com:

Materials:
- Hanging pocket shoe organizer / store
- Pole and attachments (curtain pole or pipe fittings, screws)
- Strong metal saucepan or utensil hanging hooks
- Compost of a good quality - moisture holding type
- Selection of plants or seeds... e.g. mixed leaf salad, herbs, sorrel, peas, mini tomatoes
- Piece of wood 2"x2" - width of the pocket store to keep the base of pockets away from the wall
- Trough planter to catch drips

1. Attach pole to shed or wall - Attach a strong chrome pole with metal fittings to the shed. You could use a curtain pole. Make sure it is at the correct height especially if you want to grow plants in a trough below (see step 6). This uses the surplus water from the pockets above.

2. Attach hanging shoe store - Use strong hooks or wire to attach the shoe store. They must be strong enough to support the weight of the compost, plants and water.

3. Test Drainage - Pour water into the pockets to check the drainage, if they don't drain then make a few small holes in each of the pockets.

4. Fill each pocket with compost - Add a good moisture retaining compost, fill to 1" below the rim so that water does not pour out over the rim.

5. Add or plant seeds - Sow seeds or add seedlings.  Suggested...herbs thyme, sorrel, chives; salad mixed leaf, mustard, cut and come again, or spinach; minibel tomatoes; or petit pois peas you can eat the young leaflets and tendrils.

6. Drip Aid - Use a piece of wood to make sure the excess water drips into the trough below.

7. Maintaining a healthy hanging veg plot -
- Water slowly with a gentle flow, or you may wash soil and plants out of the pocket and it will dirty the crop below.
- Add water retaining crystals to the compost. HINT... add water to some crystals in a container and allow them to swell then add that to the compost and fill your containers, otherwise when the crystals swell they can grow so much that they push the compost, seeds and plants out!!
- Plants like tomatoes will need regular Tomato fertilizer (and use slow release granules) as the fertility of the compost will soon get exhausted.
- Do not over pick salad leaves, so the plant regrows.
- It is important to keep a look out for aphids, slugs, caterpillars and other pests.
- Remove diseased , infected or damaged leaves... compost them.
- Remove unproductive plants and compost them.
- When reusing pockets add some fresh compost.

So there you have it, your very own vertical herb garden.  There's something special about walking into your backyard for ingredients.  Reconnect with the earth and get yourself an herb garden!  And have a wonderful weekend everyone.


Friday, March 4, 2011

FUNinspiring Friday: Some girls have all the fun...and creativity

I've been obsessed with Terrariums since we discovered Tend Living a while back and did a posting of it here on our blog.  So it was to my great delight when I discovered that a Green with Envy Intern also created these works of arts (amongst many other things). And it should have been no surprise, since she's extremely talented and creative.  This chandelier-turned-terrarium from Ariel is so clever, and a great way to repurpose an otherwise out-of-date fixture. Not only do the paned panels recall the look of traditional terrariums, but the piece also includes a convenient door — originally for changing light bulbs — which is perfect for the occasional rearrangement of the plants and rocks.


Ariel is currently studying at Corcoran College of Art & Design, and does it all!  Illustrations, concept design & installation, branding and logos, and she even creates her own textiles with repeated patterns based on photos she's taken. AMAZING!

And as if she wasn't busy enough,she also explores with jewelry design, like these found metal pendants on gold plated chains.


You know how they say some girls have all the fun? It's really true in this case( note to mention she's got a ton of energy, creativity and she's gorgeous). Make sure you check out the rest of her stuff, here.

Happy Findings!

Friday, February 11, 2011

Fun Fridays ~ In ♥ with Organic Chocolate Covered Strawberries

Happy Friday everyone.  With Valentines Day just around the corner, I thought I'd send you into your weekend with a sweet and organic treat to bring some love into your life.  Who doesn't love Chocolate Covered Strawberries?  They're easy to make, delicious to eat, and in my opinion...one of the best ways to get your daily serving of fruit.  And now, you can not only show your love to that special person in your life...you can show some love to your mother earth by using all organic products to create this special indulgence.  For all you lovers out there...follow these easy steps to become a Valentines Day hero.

What you'll need:

- Organic Whole Strawberries, stem on
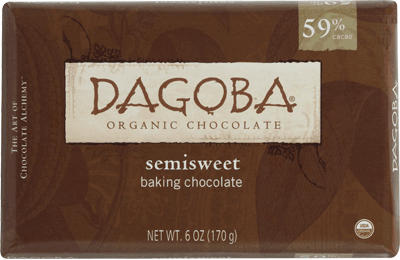
- Organic Chocolate (i love Dagoba!)


What to do:

- Wash the Strawberries

- Melt the chocolate
i like using some dark chocolate and some semisweet chocolate for a nice balance.
break up the chocolate into small bite-size pieces and melt in a saucepan on low heat, stirring constantly.


- holding the strawberry by the stem, tilt the pan and dip the strawberry into the chocolate, twirling it around until the entire strawberry is covered.

- place the strawberries on a plate with wax paper and put in the fridge for a bit until chocolate hardens.

- enjoy!


Wishing everyone a very happy Valentines Day!  

Tuesday, February 1, 2011

Wedding Wednesday: No Words Needed

I love all things old; vintage clothes and jewelry, antique furniture, classic cars and old movies. It was to my delight, then, when I stumbled upon this 'old' movie.

Kahli and Potsch, an extrmely creative couple from LA, wanted to put their love into words.  Er..action. As daunting as the task seemed, they created this silent movie with the help of their friend, in one weekend.  And it premiered with great approval at their reception.


Here's "Falling for You" by Kahli & Potsch. Enjoy, I sure did.


Happy Wednesday. xoxo, Laura